







Setting up a modular garden workshop for repairs and sewing
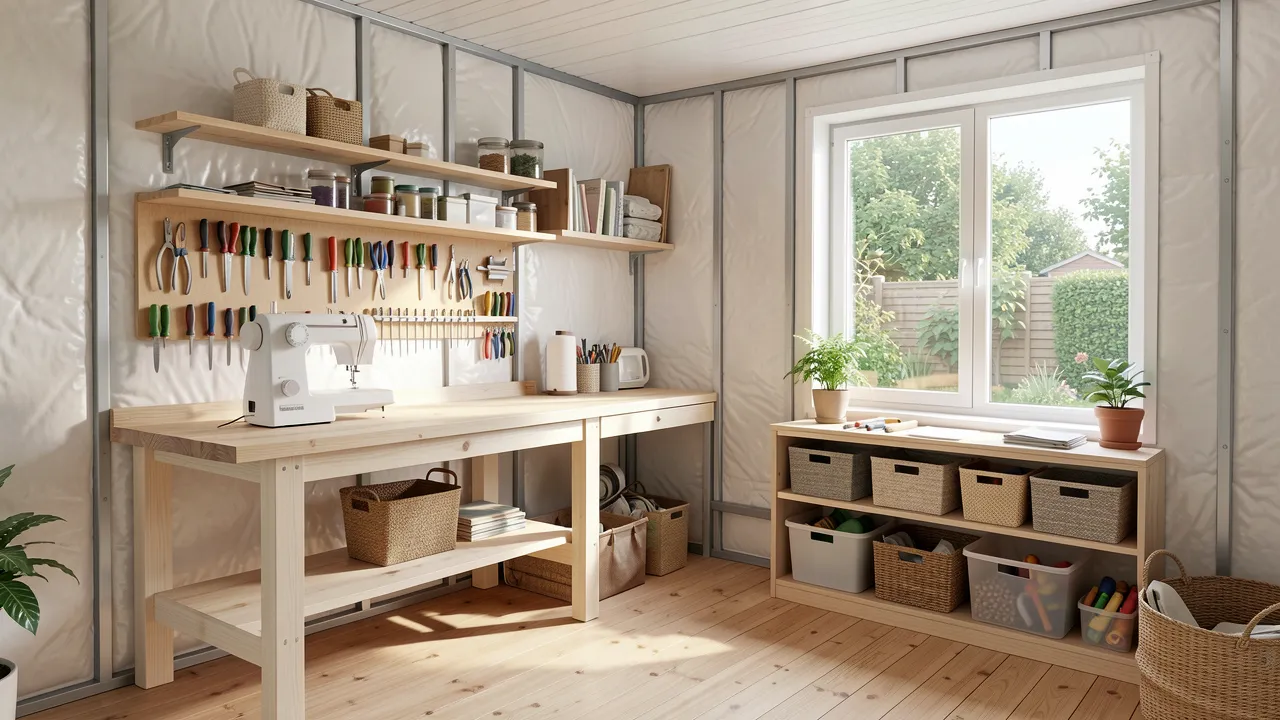
A modular garden workshop can give you a dedicated place for sewing, household repairs and small renovation tasks without taking over a kitchen table or spare room. Whether you choose a portable cabin or a prefabricated garden building, careful preparation turns a simple structure into a clean, efficient space for ongoing home maintenance.
A modular garden building can become a reliable workspace
Before selecting a building, consider the projects you expect to complete most often. Sewing and curtain alterations require a clean, well-lit table, while repairs to furniture, bicycles or household fittings need a stronger workbench and room for tools. A building that feels spacious when empty can become restrictive once shelves, storage boxes and materials are installed.
Portable cabins and modular garden rooms are available in different sizes, wall constructions and finishes. Look for a layout that allows a clear route from the door to the main work area, with enough wall space for storage. For practical ideas on garden structures, home improvements and building projects, you can learn more about solutions suited to domestic spaces.
Choose a level, stable base before delivery or assembly. A concrete slab provides a durable foundation for heavier benches and storage cabinets, while a properly prepared timber base can suit a lighter portable structure. Check local planning requirements, boundary distances and access for delivery vehicles before committing to a location.
Light and power should shape the layout
Natural daylight makes detailed sewing, painting and repair work more comfortable. Position windows to bring light onto the work surface, preferably from the side rather than directly behind you. A glazed door can add brightness, but it should not be your only light source.
Install bright overhead lighting and focused task lights above the sewing table and workbench. LED fittings offer good visibility while using little energy. If you plan to run a sewing machine, drill, sander or battery charger, ask a qualified electrician to provide suitable sockets, circuit protection and outdoor-rated cabling.
A dedicated electrical installation is safer than relying on extension leads running from the house. Keep sockets above bench height where possible, away from damp floors and areas used for washing tools.
Insulation and ventilation make year-round work possible
A garden workshop that is too cold, humid or stuffy soon becomes an unused storage shed. Insulating the walls, roof and floor helps you work comfortably through changing seasons while also protecting fabrics, tools and paint supplies.
Use insulation suited to the construction of the building. Rigid boards can work well in framed walls and floors, while mineral wool is often used between timber studs. Cover internal insulation with plywood or plasterboard, depending on the finish you want. Plywood is especially useful in a workshop because hooks, shelves and tool holders can be fixed to it easily.
Manage moisture before it damages supplies
Ventilation prevents condensation, especially when you bring wet boots, freshly washed items or damp garden equipment into the space. A trickle vent, opening window and small extractor fan can provide effective airflow. If the workshop is used for painting, gluing or sanding, use extraction suited to the products involved and keep doors or windows open when conditions allow.
Raise stored materials off the floor and avoid placing fabric, paper, cardboard or electrical tools directly against external walls. A compact dehumidifier can help in persistently damp conditions, but it should support, not replace, good insulation and ventilation.
Plan separate zones for repairs, sewing and storage
Even a small workshop feels easier to use when each activity has a defined place. Start with the workbench, as it will usually be the heaviest and most frequently used item. Position it against a solid wall, leaving room to stand and move around it safely.
A sewing station benefits from a table deep enough for a machine, cutting mat and fabric handling. Place drawers or shallow boxes nearby for thread, needles, scissors, pins, measuring tapes and spare machine parts. Store textiles in sealed containers to keep out dust and moisture.
For household repairs, arrange tools by task rather than by random size. Keep frequently used hand tools, such as screwdrivers, pliers, a hammer, tape measure and spirit level, within arm’s reach. Less common equipment can go on higher shelves or in labelled drawers.
Vertical storage frees valuable floor space. A pegboard above the workbench keeps tools visible, while wall-mounted rails can hold clamps, extension leads and small baskets. Clear boxes are useful for screws, plugs, brackets and replacement fittings, provided each box has a readable label.
Safety measures keep the workshop pleasant to use
A tidy workshop is safer and more productive. Keep a clear floor around the door and workbench, and store sharp tools in drawers, cases or covered racks. Use non-slip flooring, particularly near entrances where rain or mud may be brought inside.
For a durable finish, consider sealed plywood, vinyl flooring or interlocking rubber tiles. These materials are easier to sweep than carpet and can cope with dropped tools or paint splashes. Add a washable mat near the entrance to protect the main floor.
Keep a small first-aid kit, fire extinguisher and smoke alarm in accessible locations. If you store paints, adhesives, solvents or fuel for equipment, use a lockable cabinet and follow the manufacturer’s storage guidance. Avoid using portable gas heaters in a compact enclosed workshop.
A well-planned workshop supports everyday home maintenance
Once your space is organised, it can handle a wide range of useful household jobs. You can shorten curtains, mend clothing, repair a loose chair joint, replace cupboard handles, touch up painted surfaces or prepare shelves for installation indoors. Keeping renovation supplies in one dedicated place also reduces clutter in hallways, garages and living areas.
Review the workshop every few months. Remove empty packaging, dispose of expired products safely and return misplaced tools to their zones. This regular reset helps the building remain a workspace rather than becoming an overflow store.
Key points to retain include:
- Choose a modular building size that matches both your projects and storage needs.
- Install reliable lighting, safe electrical outlets and effective ventilation.
- Insulate walls, roof and floor to protect tools, textiles and materials.
- Create distinct zones for sewing, repairs, supplies and larger tools.
- Use wall storage, labelled containers and a clear floor plan for safer working.
- Maintain the space regularly so it stays ready for the next household task.
Create a garden workshop that remains useful for years
A modular workshop works best when comfort, storage and safety are planned before the first bench is installed. With dry conditions, sufficient power, practical shelving and a layout tailored to your routine, you can create a flexible space that supports repairs and creative projects throughout the year.
Frequently asked questions about modular garden workshops
What size should a garden workshop be for sewing and household repairs?
A compact workshop of around 6 to 10 square metres can accommodate a sewing table, workbench and wall storage. Choose a larger building if you need room for bulky materials, bicycles, timber or renovation equipment.
Can you use a modular garden building during winter?
Yes, provided the building has insulated walls, roof and floor, along with suitable heating and ventilation. A small electric heater with thermostat control can be appropriate when the electrical system has been installed safely.
Which flooring is best for a DIY garden workshop?
Sealed plywood, vinyl and rubber tiles are practical options. They are hard-wearing, simple to clean and more suitable for dropped tools or spilled materials than carpet or untreated timber.